Made From Pinterest would like to welcome Melanie Artz from Artzy Creations. We are so lucky that Melanie has agreed to be a monthly contributor on our blog. Look for her great posts on the first Friday of every month and are you going to love what she has for us today!
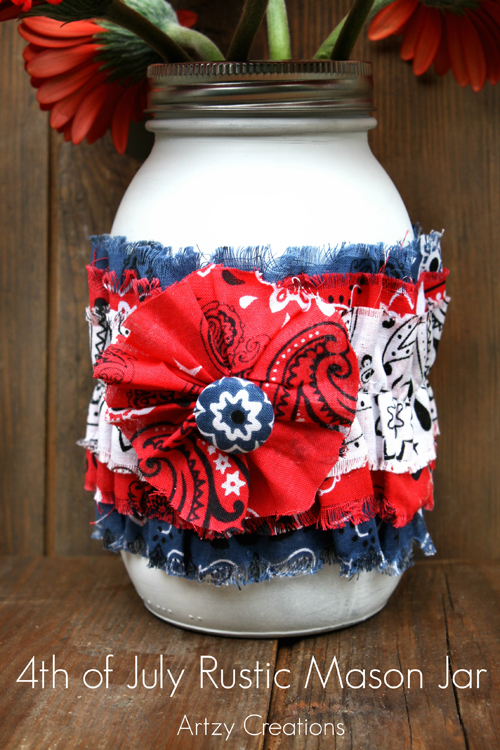
4th of July Rustic Mason Jars
Hi to all the Made From Pinterest fans! I’m Melanie Artz from Artzy Creations and I’m so excited to be here with you today. I blog about DIY, crafts, kids crafts along with a few recipes and beauty posts. Overall, if it’s “Artzy” you will find me making it! If you have a chance, I would love for you to stop by and check out Artzy Creations. Well, I had the pleasure of meeting the awesome Made From Pinterest sisters at the SNAP conference this past April and I’m so excited because they have asked me to be a regular contributor. Today, I want to share with you a great way to jazz up an every day Mason Jar for the up and coming 4th of July Holiday. With Mason Jars being so popular, I thought it would be super cute to have some that had ruffles on them making a great centerpiece. So, here is my tutorial for the 4th of July Rustic Mason Jar.
Here’s What You Need:
- Mason Jar (Quart Size with ring)
- White Spray Paint (Flat Protective Enamel)
- 3 Bandannas (Red, White & Blue) I found these at Walmart.
- Hot Glue
- Needle & Thread (But, a sewing machine is preferred)
- Button Cover Kit
Begin by spray painting the mason jar with the white spray paint and let the it dry thoroughly.
Step 1: Cut your three strips of fabric. Cut your Blue bandanna 4″ in width, Red to 3″, and White 2″. Make sure you have no finished edges remaining, so go ahead and cut them off of the ends.
Step 2: Fray the edges of your bandannas by pulling a few of the the top & bottom horizontal threads of the bandanna. You can also use a sewing pin to help fray the edges. Just pick at the individual strings and then pull on them to help the edges fray.
Step 3: Lay your (3) fabrics on top of one another and sew a loose single stitch down the middle.
Step 4: To create your ruffle, take one of the two threads and gently pull it, causing the sewn fabric to pucker.
Step 5: To create the fabric flower, cut a 1″ strip of fabric 6″ in length. Next, base stitch along the bottom of the fabric. Once you get to the end, pull it tight and sew/tie it off. Create a button using an easy button cover kit. I finished the flower by sewing the fabric covered button to the center.
There you have it. I think these would make great centerpieces for any 4th of July Celebration.
I hope you’ve enjoyed this tutorial.
You can follow me at Artzy Creations Instagram Google+ Facebook Pinterest Twitter
Thanks so much Melanie! What a darling craft that we can make in plenty of time for the 4th of July. We’ll see you next month!
We’re sharing this post with:


Leave a Reply