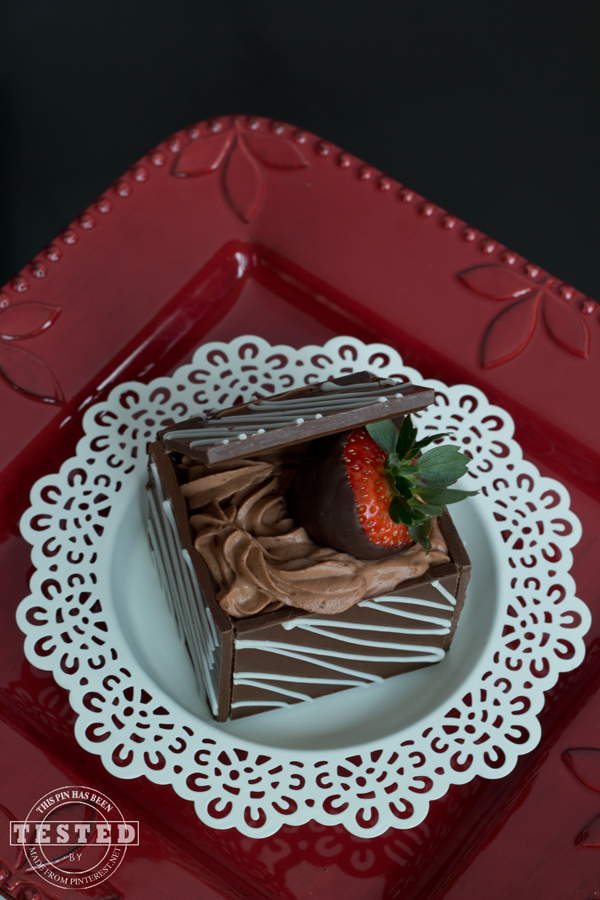
Do the words “some assembly” required make you shutter?!? The translation usually means everything needs to be assembled with directions that are clear as mud. My Valentines Chocolate Box does require “some” assembly, however no tools are needed. You will need chocolate, chocolate and more chocolate.
My husband and I decided to spend a major portion of the holiday break re-designing and re-decorating our 12 year old son’s bedroom. He’s our our fifth and last child, we have learned over the years that involving our kids with projects like these helps them understand and appreciate all the hard work that goes into re-doing a bedroom. When it came time to assemble his night stand we gave him the instructions and minimal guidance so he could learn how to follow directions for himself.
He learned the valuable lesson that “some assembly required” equates to wondering who wrote the darned instructions! I have to give him credit where credit is due because after making a few mistakes, he corrected them, stuck with it and got the night stand assembled. He was pretty proud of himself when it was finished. I didn’t tell him about the small leftover screw I found 🙂
Making my Valentine Chocolate Box was much easier and more enjoyable than assembling a night stand! A big thank you to the folks at Taste of Home for such a fun, creative Valentines gift idea.

Valentines Chocolate Box
Ingredients
- 1 carton 7 ounces milk chocolate for dipping
- 4 fresh strawberries
- 5 milk chocolate candy bars 1.55 ounces each
- 1/2 cup vanilla or white chips melted
- 1/2 cup cold milk
- 1/4 cup instant chocolate pudding mix
- 1-1/4 cups whipped topping
Instructions
- Melt dipping chocolate according to package directions; dip strawberries into chocolate and allow excess to drip off. Place on a waxed paper-lined baking sheet; set aside.
- Follow package directions to melt the dipping chocolate. Dip 3/4 of each strawberry into chocolate, allow excess to drip off and place on a waxed paper-lined baking sheet. Set aside and allow to set.
- Carefully cut candy bars in half widthwise. Place on parchment paper and drizzle with white chocolate; refrigerate until set.
- Using a vegetable peeler shave off a small amount of the edge of the short side of two candy bars, dip the shaved sides into the melting chocolate and place at right angles to each other on a waxed paper-lined baking sheet, forming two walls of a box. Dip the short shaved sides of two more candy bar halves; attach at right angles to form a four-walled box. Repeat, forming a second box. Refrigerate boxes and strawberries until set, about 10 to 20 minutes.
- While the boxes are setting use a small bowl to whisk milk and pudding mix for 2 minutes. Let stand for 2 minutes or until soft-set; fold in whipped topping and place in refrigerator.
- Place boxes on serving plates. Using a pastry tip or plastic bag with the tip cut off pipe pudding mixture into the boxes.
- Remelt dipping chocolate if needed. Dip the long sides of remaining candy bar halves into melted chocolate; adhere to a top edge of each box, forming a lid. Garnish with chocolate dipped strawberries. Refrigerate for 10 minutes or until set. Yield: 2 boxes (2 servings each).
Here are few more great ideas for Valentine’s Day!
This great post has been shared with Living Well Spending Less and Whipperberry.


Leave a Reply