Valentines Glitter and Stripes Wall Art!
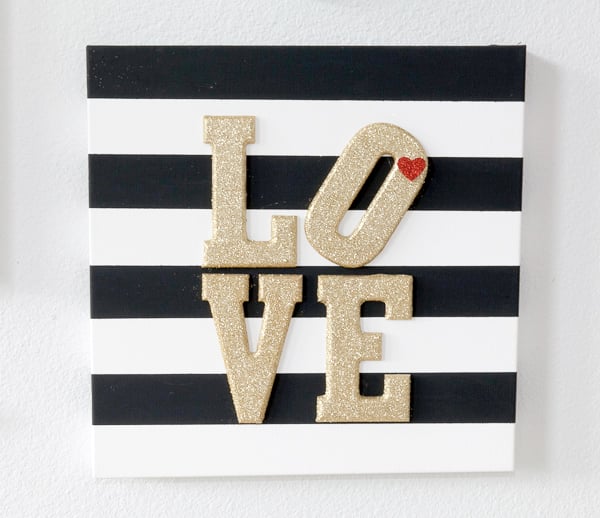
Hey there! This is Paula Biggs writing from over at Frog Prince Paperie where I like to make a little crafty party magic for kiddos and grown-ups alike. Valentine’s Day is one of my favorite holidays to celebrate, as it’s probably the only one where it’s OK to be unabashedly red and pink and sparklingly girly about decorations. I’m thrilled to bits MFP has asked me to post up a V-day project for their Love Potion #9 series, and really love this Valentine’s Day Wall Art I made for today — especially the glitter part.
Being the craft supply hoarder I am, I had everything but the wooden letters for this project stashed away in my shelves. (I’m telling you, when the Craftopocalypse comes, I’ll be ready!!) The original Valentine’s Day wall art inspiration comes from Hey Lauren Rene and her pin for this DIY Glitter LOVE Canvas. You can see the pin on my Valentine’s Day board!
Glitter aside, the part of this project I think I like the most was how massively easy it was to make. I am talking less than 30 minutes with drying time. And no real painting skill required. Since sitting around waiting for the glue to dry takes the longest, I went ahead and did that part first. Using a disposable foam brush to smooth on the Elmer’s School Glue made the process pretty quick–it was brush, glitter repeat until all four letters were done. Be sure to do this part over paper for easier clean-up. I set the glittered letters on some overturned ramekins to dry so they didn’t stick to my paper (or anything else).
While waiting for the glue to set, I taped off my canvas. I covered the areas I wanted to stay white in 2-inch ribbons of blue painters tape. The painter’s tape on canvas worked beautifully! Once I was all taped up, I quickly spread on the black paint and waited for everything to finish drying. After it was all no longer tacky, I ripped off the blue tape (this is always the most exciting part of using blue painter’s tape!) and stood back in amazement at the perfect stripes on my canvas.
In fact, I was SO excited about how fabulously flawless that canvas turned out, that I completely spaced on an all important step in my eagerness to see my work of art complete…sealing the glitter on the letters. Word to the wise, only skip the sealing part if you want a trail of glitter dust following you around the house and all over your furniture as you’re hanging your canvas up or trying to take pictures of it.
What I did differently from Hey Lauren Rene: I used a different sized canvas and different style of wooden letter. I love that this Valentine’s Day Wall Art project is so flexible. I opted for a square canvas, as it fit in better with my overall wall gallery. The craft store has what the craft store has, so I just chose a set of letters that were a good size for the canvas I used; I didn’t have too many choices for fonts, so picked one that looked close to what Hey Lauren Rene used. I also added a little red glitter heart to my canvas. The finished product was hung against a lot of white, and I felt it just needed a dot of color to set it off.
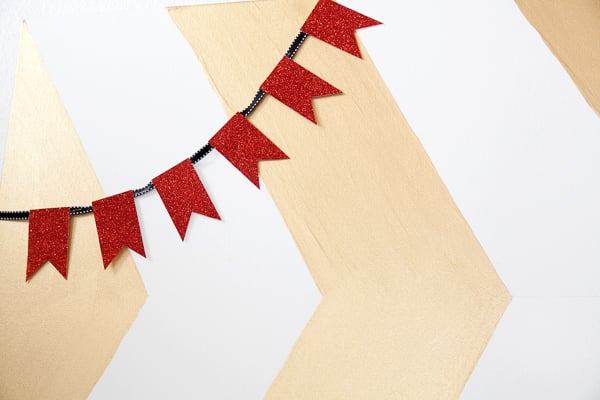
While browsing for Valentine’s Day projects on Pinterest, I also ran across these cute heart-shaped pillows from Design Love Fest. Mine were pretty much a fail, as I got a little wild with my template and the curves of my hearts were way too big, and the template too small for a good size pillow. Even though they weren’t perfect, they are a nice pop of color in my otherwise white room. I also DIY’d a cupid’s arrow in black and gold to go along with my Valentine’s theme. The tip is a pretty heart locket I buffed gold, that I may have put a picture of my sweetie in. Along with the LOVE canvas, my living room wall is ready to bring on the hearts and flowers of Valentine’s Day!
Thanks again to MFP for asking me to guest post! I’d love it if you’d stop on by Frog Prince Paperie for Valentine’s Day party inspiration, and maybe find some tutorials and recipes for a few other holidays, too! You can also find me on Facebook, Pinterest, Instagram, Twitter and Google+.
A FEW OF MY MOST POPULAR POSTS:

“How to Train Your Dragon” Birthday Party
DIY Papel Picado for Mexican Fiestas
How to Train Your Dragon happens to be one of my all time favorite movies, Toothless and Hiccup’s relationship warms my heart. It’s no wonder I love Paula’s How to Train Your Dragon Party Inspiration so much! We are thrilled to announce that Paula will start guest posting for us on March 4th, I can’t wait to see what she will be sharing with us next!
This awesome post has been shared with Living Well Spending Less!


Leave a Reply