What stops you from doing a DIY project? Anything on the list below ring true for you?
- I’m not sure what to make.
- I’ve decided on a project, but now I’m not sure about the colors/style.
- I don’t have time to plan out and search for all the items I would need for my project.
- I’m tired of ending up with extra crafting supplies because the items I need are only sold in packs instead of individually.
- I’m not sure my DIY project will turn out as good as the one I saw on Pinterest.
Wouldn’t it be great if you could get a Pinterest inspired DIY project kit with supplies and clear instructions delivered straight to your door? What if I said it was still reasonably priced? If you’re already thinking about projects you’d like to get started on, then Nicole Farb Founder of Darby Smart is your lady! Nicole works with Pinterest influencers who design DIY projects, for which she then creates and sells kits. She invited us to try out 3 of her amazing DIY project kits and yes, we are excited!
It gets even better, Nicole is sponsoring a giveaway for us! She has graciously agreed to giveaway 3 of her Wood Burning Starter Sets ($69 value, Free S&H). Click here or on the graphic below, enter your email and you are entered in the giveaway, easy peasy!
Giveaway Runs: Tuesday March 12th thru Friday March 14th
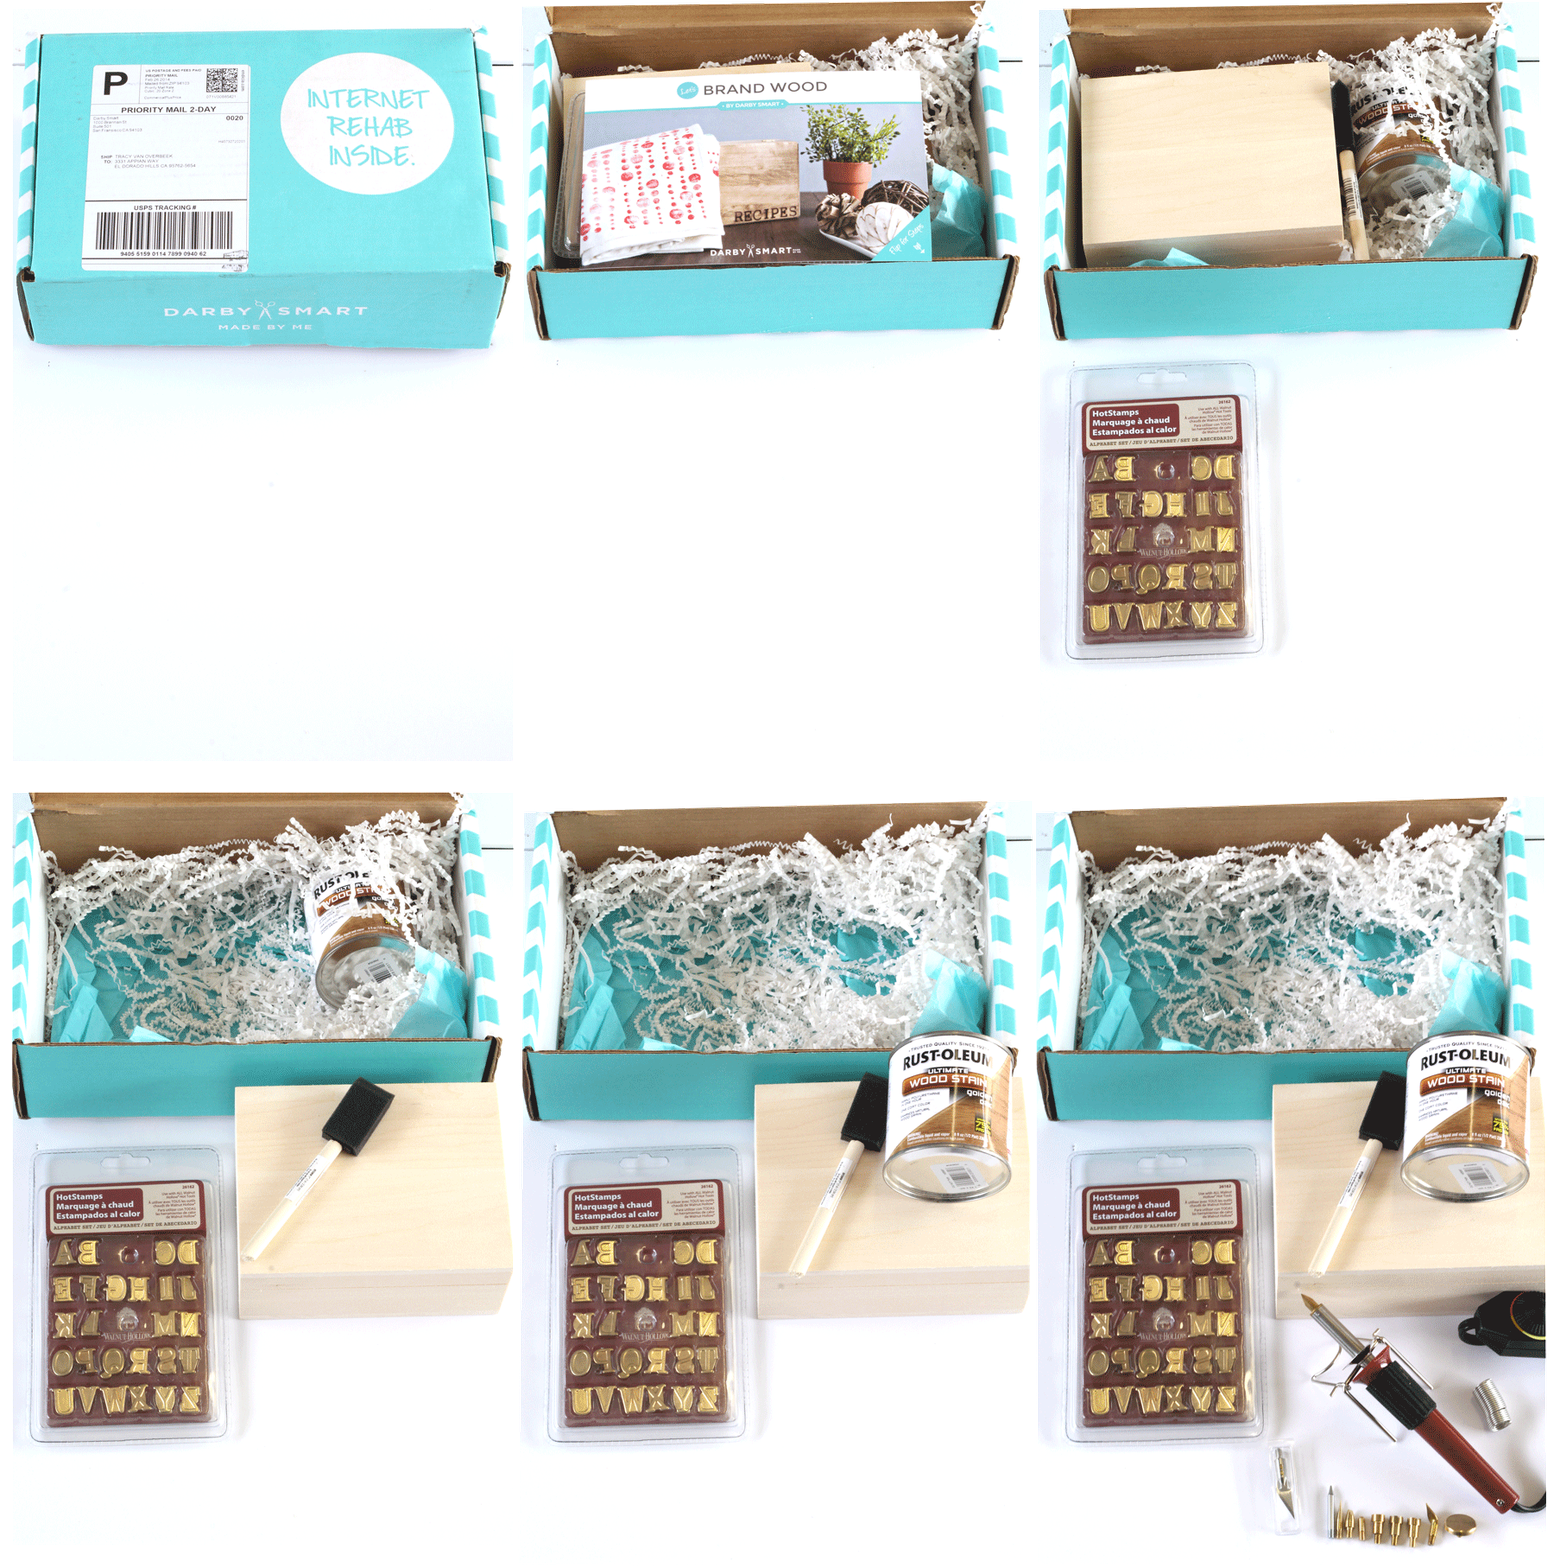
What is included in a “Wood Burning Starter Set”? Everything you need to get started and complete a fun designed by you wood burnt box!
My kit included:
- Adjustable Heat Wood-Burning Tool Kit with 10 different tip attachments
- Alphabet letter attachments
- Wooden Treasure Box
- Foam brush
- Wood Stain
- Detailed instructions
It took me just 2 minutes to get everything unpacked and to get started on my design. This was my first experience with a wood burning kit so I decided to start with something that would be easy to do. Dandelions turned out to be the perfect choice: they were simple but still pretty.
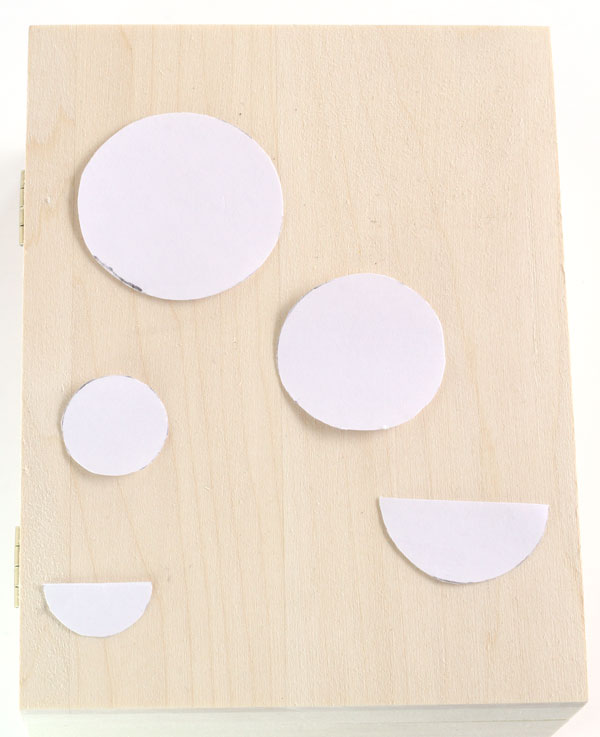
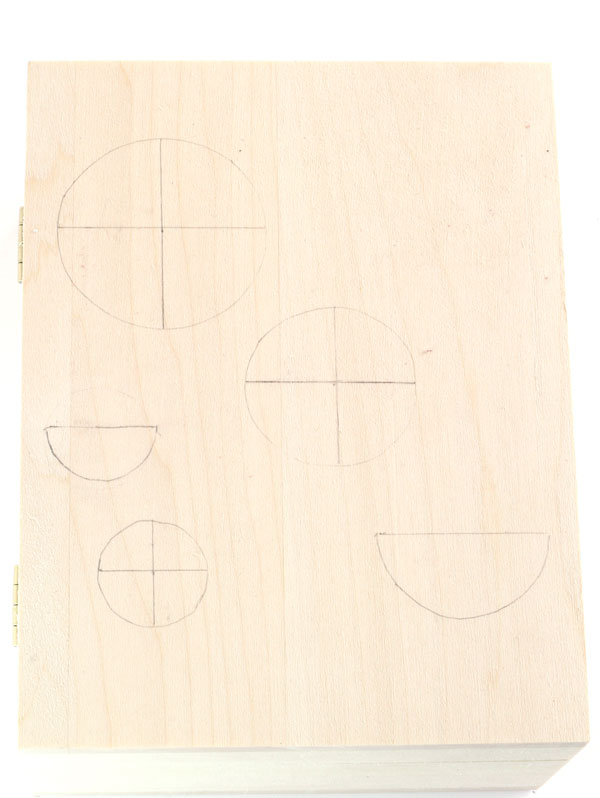
I started by cutting out several different sizes of circles and arranging them on top of the box. Once I found the look I wanted, I traced the circles very lightly on the box. I marked the center in each circle and then drew 2 lines dividing each circle in to 4 equal parts. Once I had my circles traced on my box, I immediately changed my mind about the design. I simply erased a few circles and then re-traced them in their new position.
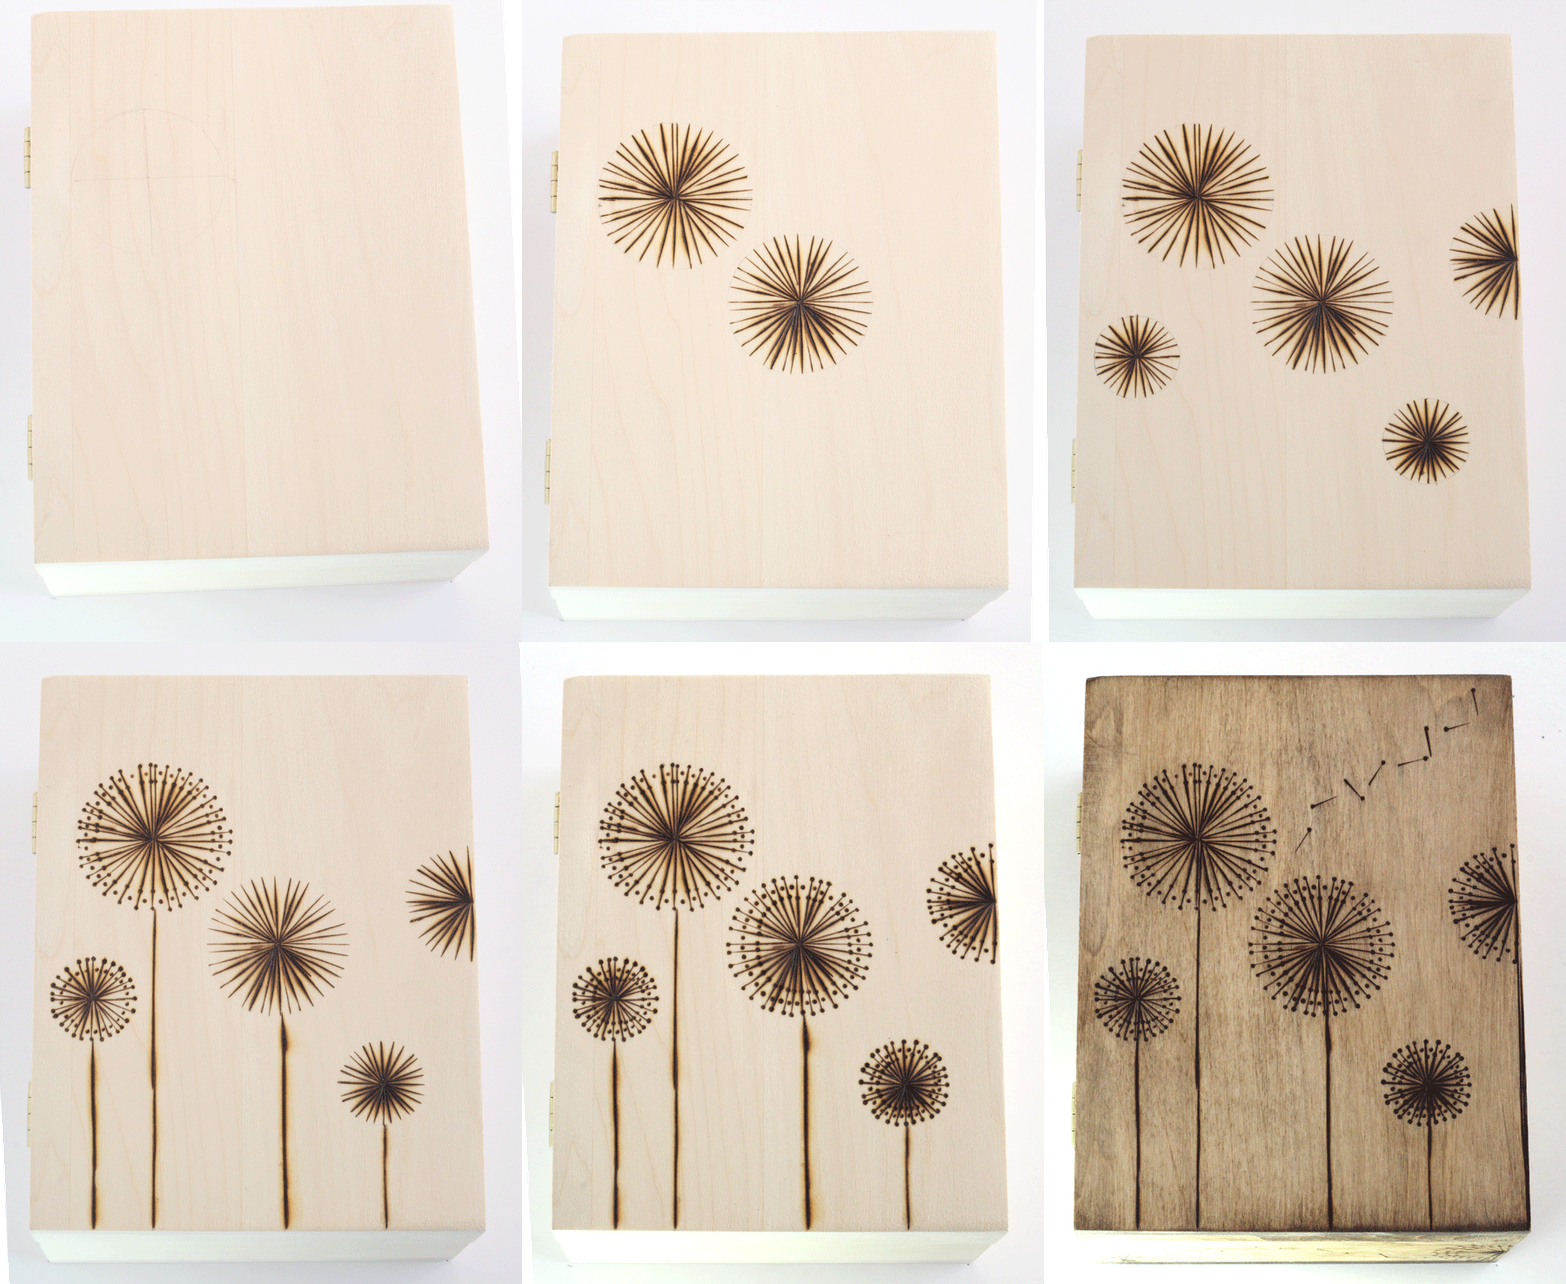
This is where the fun began, I started burning the dandelions into my box. The GIF below shows you exactly how I did this. I used setting 2 on the wood burning tool since I wanted to take my time without burning too much wood. I only used two of the ten attachment tips to create my design.
Once I was finished with the wood burning tool, I used the sponge to apply a thin coat of wood stain. I quickly wiped it off with a paper towel to get the shade I wanted. Total DIY project time was 2 hours to create my darling dandelion box . I’m already thinking of how many kits I want to purchase as birthday, Christmas, and wedding gifts.
You can follow Darby Smart on Facebook, Twitter, Pinterest and Instagram. Head on over to her site to shop for a DIY project kit of your choice! You can save even more money by signing up for Darby’s DIY project newsletter that shares the latest deals and coupons for the best monthly subscription boxes!
What do I think about this Wood Branding Kit by Darby Smart? Darby and her kits…….
Totally Rock!
Remember 3 kits are being given away and one of them could be delivered right to your doorstep! If you haven’t entered the giveaway go for it now, click here or on the graphic below to enter.
Giveaway Runs: Tuesday March 12th thru Friday March 14th

We are sharing this with:Chef In Training, Mandy’s Recipe Box, Inside BruCrew Life, Lady Behind The Curtain,Tatertots And Jello, Flamingo Toes, Chef In Training, Mandy’s Recipe Box, Hun What’s For Dinner



Leave a Reply